
How to use
Choose a section below for simple steps and screenshots.
Before you start
Sign in to write and save reports. Your free account includes 50 AI credits each month. Writing a new report or asking AI to edit one uses one credit. Saving, copying and downloading are free.
Use first names only. Choose Step by step to work through the form with Next and Previous, or Single page to see it all together. These choices are in the small menu beside the section heading.
Write a single report
Choose your report settings
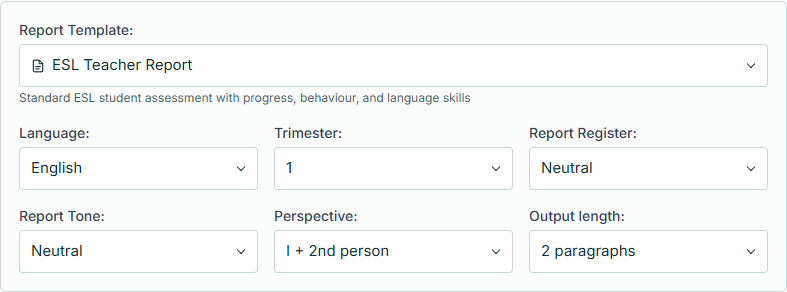
Open Report Writer and leave the top menu on Single report. Choose a template: this sets the questions in the form. Pick the language and term, then the tone and length you prefer. If you are unsure, leave the other choices as they are. Select Next.
Enlarge screenshot Add your student’s details
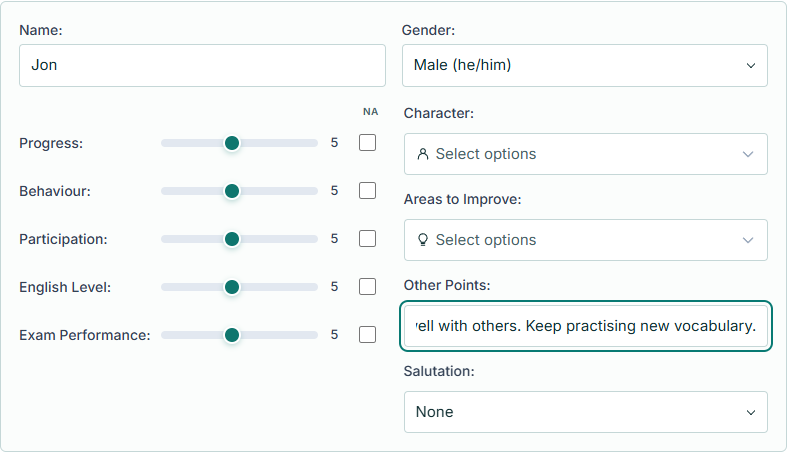
Enter their first name and choose the pronouns to use. Move each slider to rate their progress and skills from 0 to 10. Tick N/A if a rating does not apply. Choose any character traits and areas to improve, and add anything else you want mentioned in Other Points.
Enlarge screenshot Generate and check the report
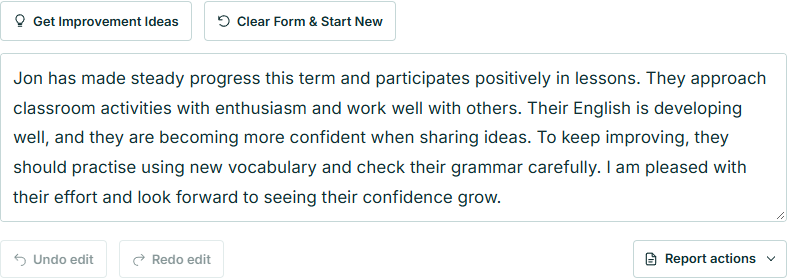
Select Generate Report. When the report is ready, read it carefully and click inside the text to make any changes. To copy it, open the Report actions menu underneath and choose Copy Report. To keep it in your account, choose Save to class from the same menu.
Enlarge screenshot
Write up to 20 reports together
Switch to Batch reports
At the top of Report Writer, open the Single report menu and choose Batch reports. Pick the settings for the whole group, then select Next. Choose your template before adding students.
Add each student
Fill in the student form just as you would for one report. Select Add student & next to keep their details and start the next student. Repeat for up to 20 students. The saved names appear below the form; select a name if you want to change their details.

Enlarge screenshot Generate the reports
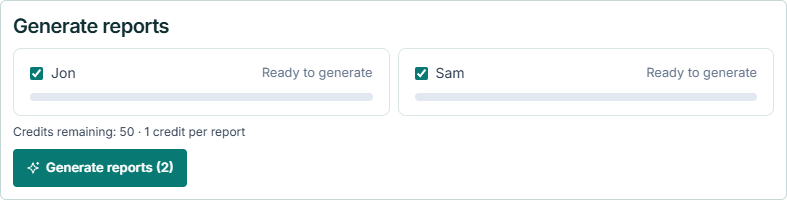
In Generate reports, tick the students you want to include, then select the green Generate reports button. Wait while each report is written. If you need to stop, choose Pause after this report; you can finish the others later.
Enlarge screenshot Read, edit and use them
Read each report and click in its text to make changes. Open All report actions above or below the reports to copy, download or save them together. For just one student, open Report actions below their report.
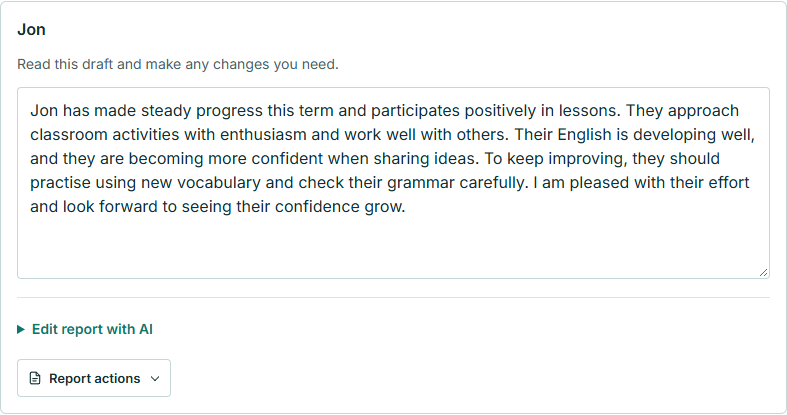
Enlarge screenshot
Your unfinished batch stays saved in this browser. To keep finished reports in your account and open them on another device, save them to a class. On a shared computer, choose Clear batch when you are done.
Open Report WriterSave and organise reports
Open the save window
For one report, open Report actions below the text and choose Save to class. For a batch, open All report actions and choose Save reports to class.
Choose a class and a tab
Choose a class, or select New class and enter a name. Then, choose a report tab, or select New tab to make one. Tabs let you separate reports by term or any other period. For a batch, tick the students you want to save, then select Save selected reports.
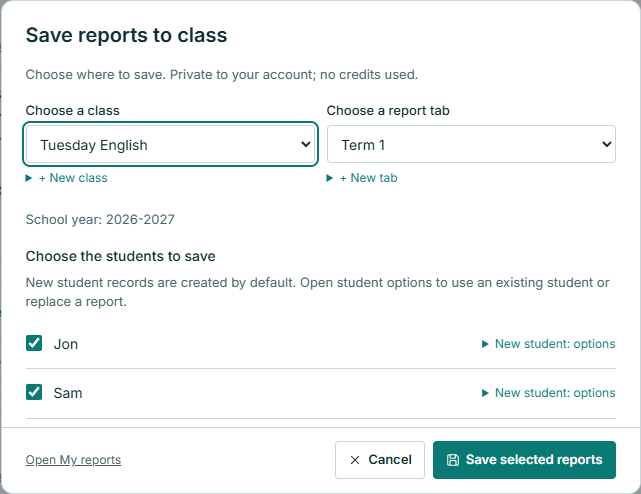
Enlarge screenshot Keep a student’s reports together
Saving another report for a student already in the class? Open Student options beside their name in the save window, then choose that student in the Student record box. Leave Save as on Create a new report to keep their earlier reports too.
Find your saved reports
Select My saved classes & reports near the top of Report Writer. Choose your class and tab to see the reports. The + beside the tabs adds a new one. Double-click a tab or the class name to rename it.
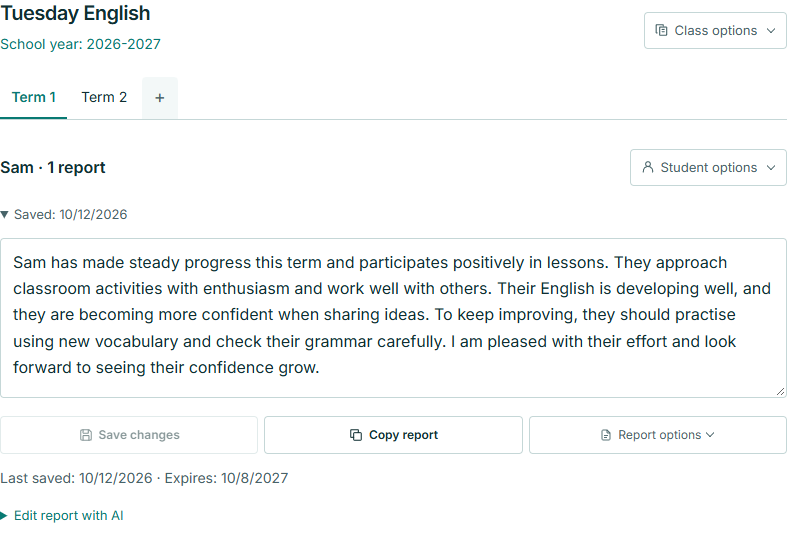
Enlarge screenshot Download a copy
Open Class options to download the reports from the selected tab or from all tabs. To download just one report, open Report options below it and choose Download report.
Saved reports are private to your account. They expire 12 months after their last save.
Open My Classes & ReportsGet personalised improvement suggestions
Generate suggestions for your student
After creating a single report, select Get Improvement Ideas above the report. AI uses the student’s ratings, the areas to improve you selected and your notes to suggest practical ways to help them. The suggestions appear below the report. This uses one AI credit.
Ask for more specific ideas
To adapt the suggestions, use the Edit with AI box below them. Choose Edit: Strategies so your request changes the suggestions rather than the report. For example, write “Give me three short vocabulary activities they can try at home”, then select Send. Asking AI to change the suggestions uses another credit.
Copy the ideas you want to use
Read the suggestions and change any wording by clicking in the text. Select Copy Suggestions to paste them into your own notes or a message to the family. You can also paste a useful suggestion into the student’s report before saving it.
Edit a report
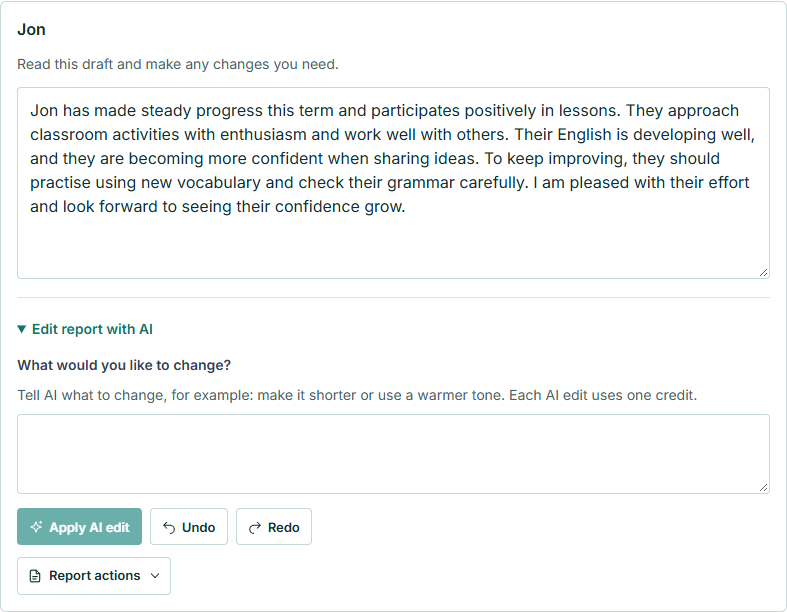
Click inside a report and type to change the wording yourself. If you opened it from My classes & reports, select Save changes underneath when you finish.
To ask AI for help, open Edit report with AI beneath a batch or saved report. For a single report, use the Edit with AI box below it. Write a simple request, such as “Make this shorter and friendlier”, then select Apply AI edit or Send. Read the new version before saving it.
Create and reuse your own template
A template is a form you can use again: it decides which ratings, languages and choices appear when you write a report. You can use the ready-made templates, or create your own in Template Builder.
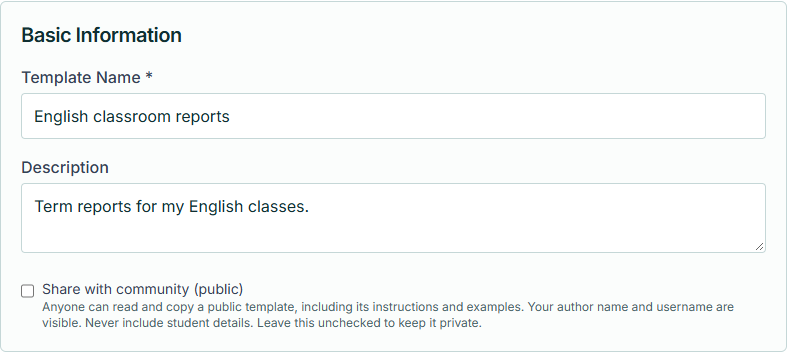
Give it a name
Open Template Builder and enter a name you will recognise, such as English classroom reports. The description is an optional reminder of what it is for. Leave Share with community unticked to keep it private.
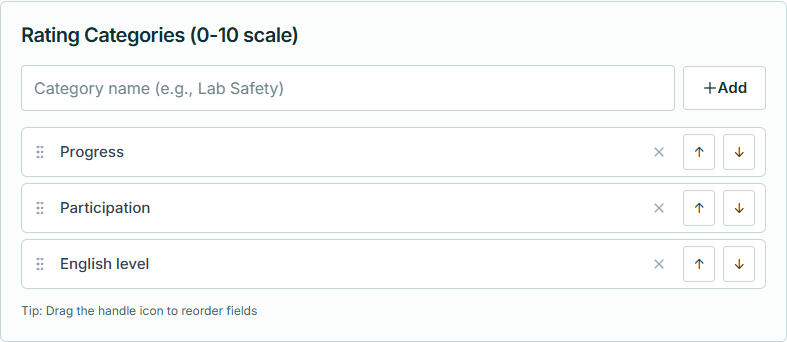
Enlarge screenshot Add your rating categories
Under Rating Categories, type something you want to rate, such as Progress or Participation, and select Add. Repeat for each category. These become the 0–10 sliders in your report form. Use the up and down arrows to change the order, or the cross to remove a category.
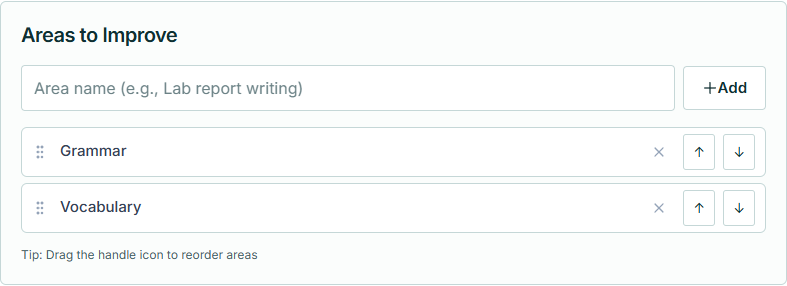
Enlarge screenshot Add areas to improve
Under Areas to Improve, type an area such as Grammar or Vocabulary and select Add. Repeat for the options you want available. Later, you can choose which ones apply to each student.
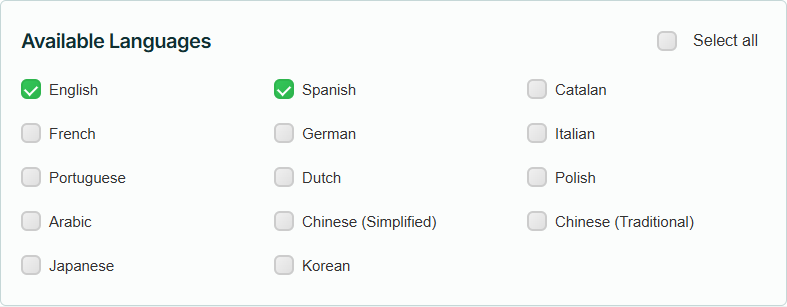
Enlarge screenshot Choose the languages
Tick the languages you want available when using this template. You will choose the report’s language later, in Report Writer.
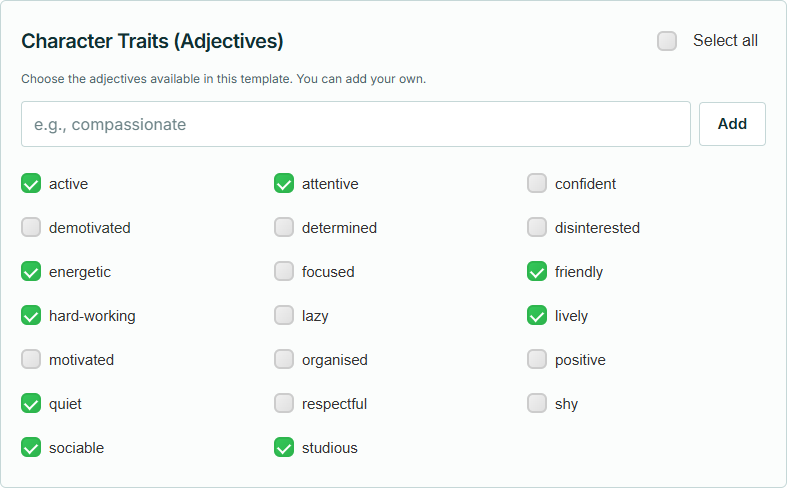
Enlarge screenshot Choose the character traits
Tick the adjectives you want in the form, such as friendly or hard-working. To include your own, type it in the box and select Add. These are choices for describing each student; you do not have to use them all in a report.
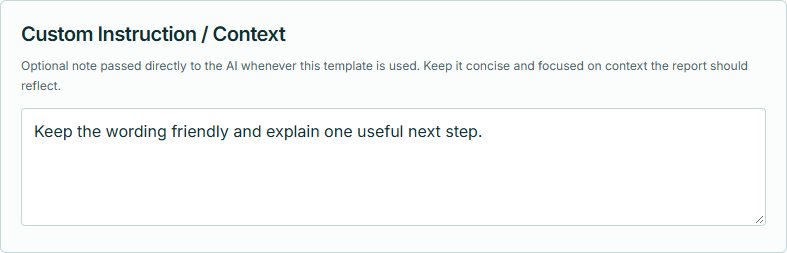
Enlarge screenshot Add any writing instructions
Custom Instruction / Context is optional. Use it for a request you want followed every time, such as “Keep the wording friendly and include one useful next step”. Leave it blank if you do not need it.
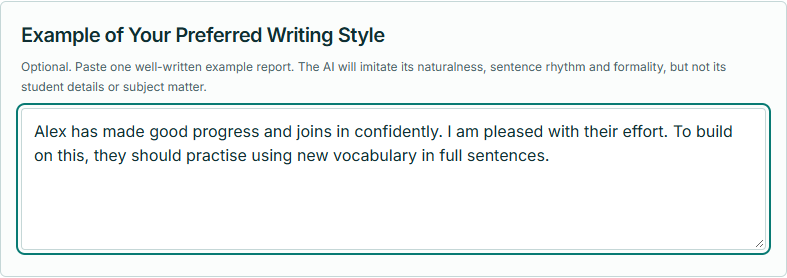
Enlarge screenshot Show your preferred writing style
The example box is optional too. Paste a short sample report if you want the AI to follow a similar style. Use made-up names and details, not a real student’s report.
Enlarge screenshot Save and use your template
Select Save Template at the bottom. Back in Report Writer, open the Report Template menu and choose your new template. To edit or copy it later, open My templates from your account menu.

Enlarge screenshot
Browse and share community templates
Open Community to see templates shared by other teachers. Choose one you like and select View Template. It opens in Template Builder, where you can look through it and make changes. Select Save Template at the bottom to keep your own copy, then choose it in Report Writer.
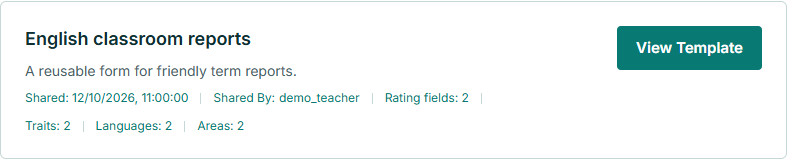
To share your own template, select Share template at the top of Community. Choose your template in the list, then select Share. Only share the form and any made-up example; never include student reports or personal details.
Browse community templatesIf you need a hand
If a report does not generate, read the message on the page. Check Usage & credits in your account menu to see whether you have credits left. In a batch, any finished reports are kept, so you can try the unfinished ones again.
Contact for helpScreenshots use made-up students and example reports.